This is my last holiday recipe and also the last post of the year – now it’s time to finish up wrapping the presents and start preparing the food for Christmas Eve.
I wish you all wonderful holidays – thank you for keeping me company in 2009. I hope to see you all here in January!
xx

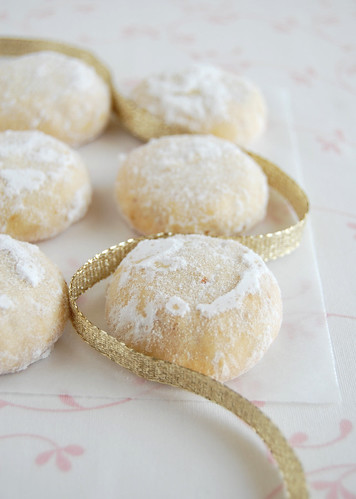
Walnut and orange snowballs
from Donna Hay magazine
250g unsalted butter, softened
¾ cup (105g) icing sugar, sifted
1 cup (105g) walnuts, finely chopped
finely grated zest of 1 large orange
2 ½ cups + 2 ½ tablespoons (375g) all purpose flour, sifted
icing sugar, sifted, extra, for dusting
Preheat the oven to 180°C/350°F; line two large baking sheets with baking paper.
Place the butter and sugar in the bowl of an electric mixer and beat for 10-15 minutes or until pale and creamy. Add the walnuts, orange zest and flour and beat in slow speed until combined.
Roll two teaspoonfuls of the dough into balls, place onto prepared baking sheets 5cm (2in) apart and flatten slightly. Bake for 10-12 minutes or until lightly golden.
Allow to cool for 5 minutes then dust well with the extra icing sugar.
Makes 55 – I got 42